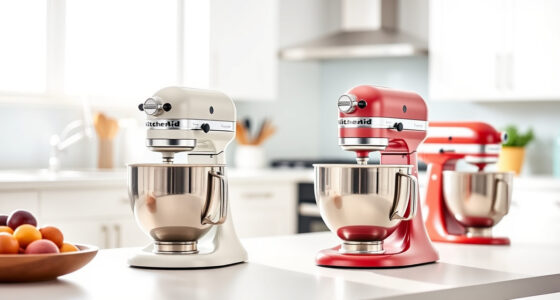

If your KitchenAid Artisan Series 5 Quart Tilt Head Stand Mixer is leaking oil, it can be concerning. While these mixers are built for durability, oil leaks can occur due to a few common issues. Addressing this promptly can prevent further damage and restore your mixer’s optimal performance.
Open a free Amazon Business account
Business pricing, bulk buying and tax-exempt orders.
Create a free accountAs an affiliate, we earn on qualifying purchases.
In this guide, we’ll walk you through the main causes of oil leaks, how to identify them, and safe, practical steps to fix the problem yourself. Remember, safety first—always unplug your mixer before attempting repairs.
Key Takeaways
| Understanding Oil Leaks | Oil leaks usually result from worn seals or over-lubrication. |
| Early Troubleshooting | Identify the leak source before attempting fixes. |
| Step-by-Step Fixes | Follow precise steps to repair seals or replace parts safely. |
| Preventative Tips | Regular maintenance reduces the risk of leaks. |

KitchenAid Artisan, 5-Qt Tilt Head Stand Mixer, KSM150PS, Milkshake
- Durable Metal Construction: Built to last with 59 touchpoints
- 5-Quart Stainless Steel Bowl: Handles small or large batches, dishwasher safe
- Tilt-Head Design: Easy ingredient addition and access to bowl
As an affiliate, we earn on qualifying purchases.
Common Causes of Oil Leaking in Your KitchenAid Mixer
Oil leaks in the KitchenAid Artisan Series 5 Quart Tilt Head Stand Mixer can stem from several issues. The most common cause is worn or damaged seals, especially around the gear housing or motor shaft. Over time, gaskets can degrade due to heat, age, or improper maintenance.
Another culprit is over-lubrication. While lubricants are essential for smooth operation, using too much or the wrong type of oil can lead to excess that may leak out, especially if applied improperly during maintenance.
Additionally, internal components such as the gear assembly or motor shaft might develop cracks or wear, leading to oil seeping out. Recognizing the source of the leak is crucial for effective repair.

KitchenAid KSMMGA Food Grinder Attachment for All KitchenAid Stand Mixers
- Compatible with KitchenAid Mixers: Connects to all KitchenAid stand mixers
- Versatile grinding plates: Includes fine, medium, and coarse plates
- Sausage stuffer tubes: Comes with two sausage stuffer tubes
As an affiliate, we earn on qualifying purchases.
How to Diagnose an Oil Leak
- Unplug the Mixer: Always disconnect power before inspecting.
- Visual Inspection: Examine the area around the gear housing, motor shaft, and base for oil residue or pooling.
- Check the Seal Areas: Look for cracked or swollen gaskets or seals.
- Listen for Unusual Noises: Grinding or squealing sounds can indicate internal issues contributing to leaks.
- Test Operation: Run the mixer briefly and observe for fresh leaks or oil spraying.
Proper diagnosis ensures you only undertake necessary repairs, saving time and effort.
Step-by-Step Fixes for Oil Leaks
- Gather Tools and Replacement Parts: You’ll need a screwdriver, replacement seals or gaskets (if available), and possibly a bit of food-safe lubricant.
- Disassemble the Mixer: Remove the tilt-head lock and carefully lift the head. Access the gear housing by unscrewing the casing screws.
- Inspect and Replace Seals: If seals are cracked or swollen, replace them with new ones designed for your model. Clean the housing thoroughly.
- Re-assemble and Lubricate: Reassemble the casing, ensuring seals are fitted correctly. Apply a small amount of food-safe lubricant if recommended.
- Test the Mixer: Plug it back in and run at various speeds. Check for leaks and proper operation.
Always follow safety precautions and consult your user manual for specific disassembly instructions.
Maintenance Tips to Prevent Future Leaks
- Regular Inspection: Check seals and gear housing periodically for signs of wear.
- Proper Lubrication: Use only manufacturer-recommended lubricants and avoid over-application.
- Clean After Use: Wipe off any excess food or oil to prevent buildup that can cause leaks.
- Store Correctly: Keep the mixer in a dry, cool place to minimize seal degradation due to environmental factors.
- Professional Servicing: If internal parts show significant wear, consult authorized repair services.
Safety Tips & Warnings
Always unplug your KitchenAid mixer before starting any repairs to prevent electrical shock or accidental activation. Handle internal components carefully—some parts may be sharp or delicate. If you’re unsure about disassembly or replacing seals, consider consulting a professional technician. Using incompatible or incorrect parts can cause further damage or void your warranty. Regular maintenance and cautious handling will prolong your mixer’s lifespan and ensure safe operation.
The Products in This Guide

KitchenAid Artisan Series 5 Quart Tilt Head Stand Mixer
- ✔ Weight: 26 lbs
- ✔ Dimensions: 14 x 8 x 14 inches
- ✔ Power: 275 watts

KitchenAid Stand Mixer Attachment
- ✔ Weight: 4.5 lbs
- ✔ Dimensions: 8 x 6 x 4 inches
- ✔ Warranty: 1 year
KitchenAid Artisan Series 5 Quart Tilt Head Stand Mixer
<p>The KitchenAid Artisan Series 5 Quart Tilt Head Stand Mixer is built for durability and versatile use. While oil leaks can occur, they are typically manageable with proper diagnosis and replacement of seals. Regular maintenance can help prevent future issues and keep your mixer running smoothly for years.</p>
Pros:
- Durable metal construction
- Easy to access and clean
- Versatile with multiple speeds
- Large 5-quart bowl
Cons:
- Occasional seal wear
- Requires careful disassembly
- Potential for oil leaks if not maintained
Best for: Home bakers and cooking enthusiasts seeking reliable performance
Not ideal for: Users uncomfortable with internal repairs or seeking a maintenance-free appliance
Bottom line: A durable, versatile mixer that may need seal maintenance over time.
KitchenAid Stand Mixer Attachment
<p>This metal food grinder attachment expands your KitchenAid mixer’s capabilities, making it easy to prepare fresh meats, vegetables, and more. It’s well-designed, easy to attach, and offers multiple grinding plates for different textures.</p>
Pros:
- Sturdy metal construction
- Multiple grinding plates
- Large tray for big batches
- Easy to clean and store
Cons:
- Requires additional purchase of the attachment
- Can be noisy during operation
- Needs pre-chilling for best results
Best for: Home cooks wanting to make fresh ground foods easily
Not ideal for: Users seeking a standalone grinder or minimal kitchen gadgets
Bottom line: A robust attachment that turns your mixer into a versatile food prep station.
Frequently Asked Questions
Can I fix an oil leak myself?
Yes, if you are comfortable with disassembly, you can replace seals and clean internal parts. Always follow safety precautions and consult your user manual.
What type of oil should I use for lubrication?
Use only food-safe lubricants recommended by KitchenAid. Avoid using regular motor oil or non-food-grade lubricants.
How often should I inspect for leaks?
Check seals and the gear housing every 6-12 months, especially if you notice any change in performance or sounds.
Will fixing the seal void my warranty?
If your mixer is still under warranty, repairs should be performed by authorized service providers to avoid voiding coverage.
Is oil leakage dangerous?
Minor leaks are usually not hazardous but can cause internal damage. If you notice significant oil loss or leaks, it’s best to repair promptly.
Maintaining Your KitchenAid Mixer for Long-Term Performance
While oil leaks can be an inconvenience, they are often straightforward to fix with proper diagnosis and replacement of seals or internal components. Regular inspection and gentle maintenance can prevent most issues, ensuring your KitchenAid Artisan Mixer continues to serve you well for years to come. Always prioritize safety and consult professional help if you’re unsure about disassembly or repairs.
Affiliate disclosure: As an Amazon Associate we earn from qualifying purchases. Prices and availability are accurate as of the time of publishing.
Back to school Picks
back to school
As an affiliate, we earn on qualifying purchases.